Tuesday, May 19, 2020

EASY Semantic Segmentation Tool!

This thing is great! Rapidly can create semantic segmentation. The only feature I'd like to add is a slider for adjusting the watershed / image cv thresholding algorithm to change its sensitivity. That said, it looks like incrementally applying watershed can help you iterate to the regions you want segmented anyway

Download Binaries

Github Repository

Config file to revise classes and colors.

Wednesday, May 6, 2020

How to move docker data directory to another location on Ubuntu

I ran out of space on my root drive as i downloaded some NGC docker containers on my linux box. I immediately needed to free some space up. With a 8GB docker image, something needed to move.

https://www.guguweb.com/2019/02/07/how-to-move-docker-data-directory-to-another-location-on-ubuntu/

This lets you move it to another drive - which is the reason I was doing it, my root directory ran out of space. Then I made a ubuntu install thumbdrive and booted ubuntu from the drive. This is sometimes called a "live linux boot disk".
(1) I shrunk my windows partition so there was room for the expansion using windows disk management.
(2) Then I used gparted to do two operations to expand the size of my root drive. Apparently I couldn't just expand the root partition, i had to do a "move left" operation first into the hard drive space I had freed up, then I did a right expansion on my root partition which worked! (I couldn't do it in one operation - gparted gives errors.)

Delightfully gparted comes with ubuntu!


Saturday, March 28, 2020

DeepFake Test!


I used code from https://github.com/AliaksandrSiarohin/first-order-model to do this. Deepfake technology is here. Whether that is good or bad. I did test the fashion weights as well. I can see there are several applications possible with this... It took me an hour or two to get everything working. It's astounding where we are today.

Monday, March 23, 2020

Recording Screen in Ubuntu


Ubuntu Screenshots
"printscreen" button. It saves to picture folder by default
https://askubuntu.com/questions/346864/how-do-i-take-a-screenshot


Recording Desktop
(1) If you want to record without downloading anything on ubuntu:
https://tipsonubuntu.com/2018/06/09/record-gnome-desktop-ubuntu-18-04/

(2) Another good screen casting software (open source) and works effectively while playing games - is OBS. https://obsproject.com/download) is made for game streamers and lets you manage multiple video streams simultaneously.

Setting up Linux computer for ML (cuda drivers)

As I've setup several desktop computers with ubuntu for on-prem ML, sometimes installing certain nvidia drivers on ubuntu can cause the graphics driver to throw an error while booting and then will give you a black screen. Here's a setup of commands to fix it:

1. Reboot machine and go to recovery mode using grub (Advanced Ubuntu)
    a. Enable Networking
    b. Drop to Root
2. sudo nvidia-uninstall #To remove all  remaining nvidia drivers, to ensure clean install
3. sudo add-apt-repository ppa:graphics-drivers/ppa
4. sudo apt-get update
5. sudo apt install nvidia-418 #Could try a newer one, but this was the most recent driver that worked for ML for me on my 2080Ti card
6. Reboot - this should've fixed it.
7. nvidia-smi #will show you if cuda and gpu driver version

Monday, February 3, 2020

Update: Windows + Anaconda with tensorflow 2

While tensorflow 2.1 is out now, I just wanted tensorflow 2.0 in my conda environment, after some experimentation this simple set of commands does it:
conda activate tf-gpu-cuda9
conda install tensorflow

To install tensorflow 1.14 in a conda environment:
conda activate tf-old
conda install tensorflow-gpu

Monday, December 16, 2019

First Oculus Quest App!

After fighting with several ADB driver issues, reinstalling unity, restarting, unplugging, replugging, adb kill-server, adb start-server commands I finally figured out how to get my own unity projects loaded into this device. In unity, I used the default/built android SDK tools that can be enabled during the install of unity. I had it working then did a firmware upgrade on my quest and everything broke. Then I installed Android SDK (studio) app thinking this would help. This may have helped with some adb version errors (41 instead of 40) that were coming with unity. By installing that, and then updating my environment variable to include the folder for platform-tools that contains adb.exe it appears to have helped with the version issue.

In addition to this, the key to getting it to show up in the command adb devices (where there were no listed devices) but I could see it in windows and navigate files was to go into the oculus app on my phone and re-enable developer mode. I had already done this before but because of the oculus firmware update, I think it resets it back to off. I was pulling my hair out trying to fix something with adb drivers when this is all I likely needed to get it working.

I did some quick write up to control my player model and then realized there was already a pretty decent player controller script that came with the prefab so I threw away my code and am starting with theirs until I find a specific need to revamp it. (just wanted to walk around anyway). A few assets later and a quick load and I have a fun looking scene! I can't wait to show my GF!

Now I've built and deployed apps for; HoloLens, Quest, and Vive! Cool! Gotta keep creating.


Sunday, November 24, 2019

Image extracting from Videos


Extracting Images
In order to extract images for photogrammetry and/or machine learning, I needed a variety of images that are very diverse in the scene, if you extract all images from videos there isn't much diversity of perspective. In order to do this I installed ffmpeg and took some OBS screencaptures from gameplay and went to work:

Here's the line that extracts images

ffmpeg -i lucio.mp4 -vf "select=not(mod(n\,100))" -vsync vfr -q:v 2 img_%03d.jpg

https://superuser.com/questions/391257/extracting-one-of-every-10-frames-in-a-video-using-vlc-or-ffmpeg


Labeling Images
Once I had all the images extracted, I wanted to use them to retrain a yolo object detector, I found and used this tool. As an aside I jotti virus scanned it too - it was clean, I used the windows version. It was super easy to use! I'll do a subsequent post if i build an interesting AI model.

https://github.com/developer0hye/Yolo_Label


Sunday, November 17, 2019

Pi-hole = Amazing ad-blocking!

This simple software package can block like 90% of the ads you see on both websites and on videos like youtube. To block an advertisement they simply route it to the raspberry pi where it isn't passed along to the user, so technically the content is still being served up.It's amazing highly encourage you to check it out.

This video walks you through doing it:
https://www.youtube.com/watch?v=KBXTnrD_Zs4
https://github.com/pi-hole/pi-hole/#one-step-automated-install

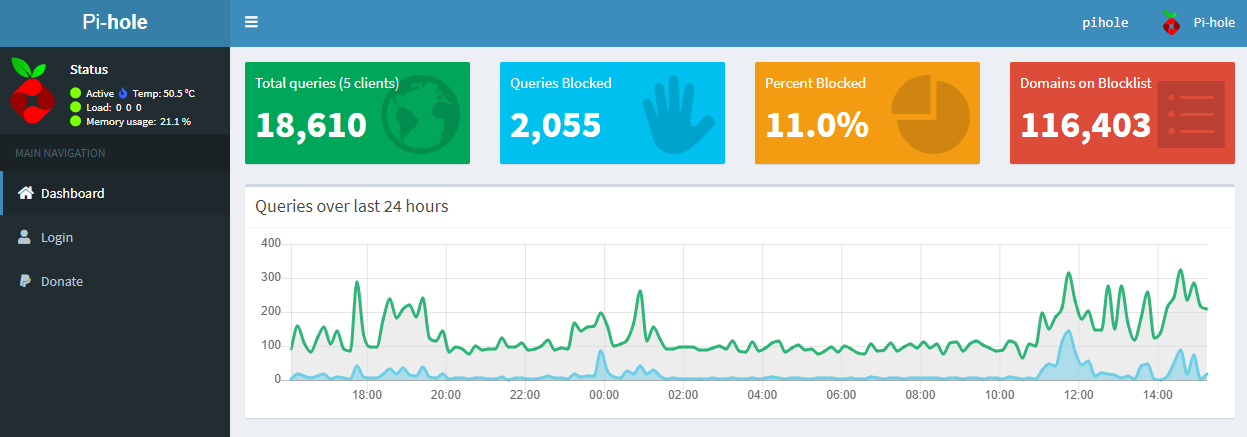
Pihole administrative site

Fixing TF+ anaconda GPU support on windows

For whatever reason yesterday it appeared the yolo model i was running on tensorflow yesterday was only running on the cpu instead of the gpu. The low frame rate is the only reason I noticed. I'm wondering if some windows update messed up my CuDNN drivers or something. Whatever the reason I decided to make a new conda environment to see if I could fix it. I knew I had already installed CuDNN from nvidia for the cuda toolkit so I was skeptical of that package being broken.

Installing TF2

So I made a new conda environment to start over and install TF2 from scratch with:
conda create --name tf-gpu
conda activate tf-gpu
conda install tensorflow-gpu

Even though, I followed the very good instructions at Puget Systems,  when i go into python to validate eager execution - it doesn't work, but when I print the tensorflow version it comes up as 2.0.0.

Installing OpenCV

I was getting an error
Traceback (most recent call last):
  File "webcam_demo.py", line 14, in
    import cv2
ModuleNotFoundError: No module named 'cv2'

which bewildered me because i thought i had it installed. I then tried the following:
pip install opencv-python
This didn't work.
I then tried:
conda install py-opencv
this worked, likely because it is respective of anaconda install processes.

Installing Yolov3 Reqs

Then I tried to install the requirements for the well written tensorflow yolov3 repo I had downloaded.
pip3 install -r ./docs/requirements.txt

This almost works except I got the same error as yesterday:
ModuleNotFoundError: No module named 'easydict'

So i needed to install easydict (NOT pip3!):
pip install easydict

CUDA Bug & Fix

I encountered a wierd nvidia graphics card issue with TF2, I've seen this issue at work and at home on nvidia graphics cards (both 2080Ti and 970 GTX at home), here was the fix that I added at the top of my python file:

# Graphics Card Fix - https://github.com/tensorflow/tensorflow/issues/24496from tensorflow.compat.v1 import ConfigProto
from tensorflow.compat.v1 import InteractiveSession
config = ConfigProto()
config.gpu_options.allow_growth = Truesession = InteractiveSession(config=config)

This let me run Yolo v3 @ 6 FPS (~160 ms) on my gpu, instead of 1 FPS on the CPU.
Yolo v3 running on GPU and tensorflow